Traditional Scottish Shortbread
Shortbread is a favourite of all seasons and a traditional Scottish staple. It is an easy-to-make treat for all the family. A traditional treat for First Footing. Perfect event for Valentine's Day, Christmas, or even a little afternoon meet-up with friends and family!
Makes 12 Pieces | Preparation Time 20 minutes | Cooking Time 25 minutes | Total Time 45 minutes
Ingredients
| 300 g | Butter |
| 150g | Caster Sugar |
| 450 g | Plain Flour |
 |
Traditional, Pale &Crumbly Method
Many Scottish bakeries bake shortbread at a lower temperature to keep it pale and crumbly.
- 160–170 °C conventional (140–150 °C fan)
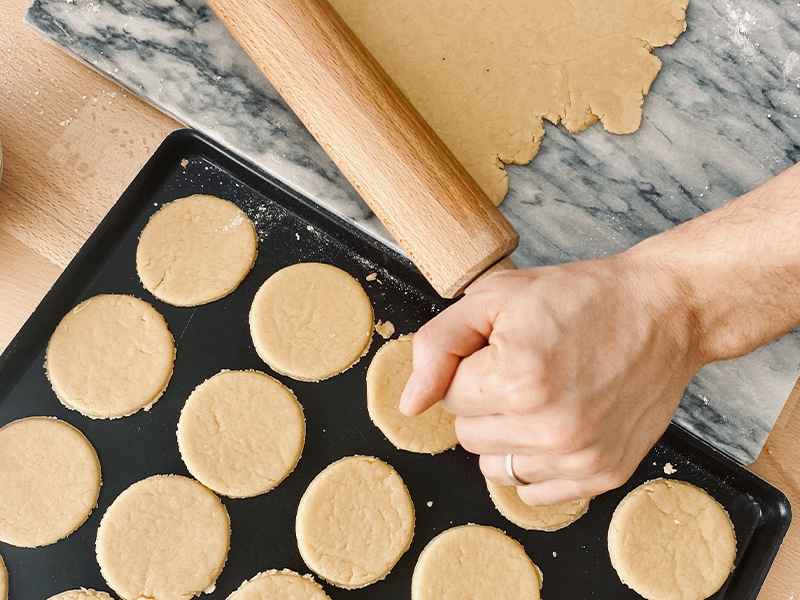
- Dice the butter and place it into the bowl of a mixer along with the plain flour and caster sugar. Using the paddle beater attachment, mix on low speed until the mixture comes together to form a dough. This will take some time — resist the temptation to overwork it.
- Turn the dough out onto a clean surface. Take a couple of large handfuls at a time and knead very lightly just to bring it together.
- Roll the dough into a long sausage shape, approximately 5–7.5 cm (2–3 inches) in diameter.
- Wrap tightly in cling film and chill overnight until very firm.
- Once chilled, slice into rounds (or rectangles), approximately 3 cm (1¼ inch) thick.
- Place 12 rounds evenly spaced onto a baking tray lined with parchment.
- Use a fork, a skewer or a toothpick to create "dockers" on the top of the shortbread. This prevents shortbread from puffing up too much and allows steam to escape.
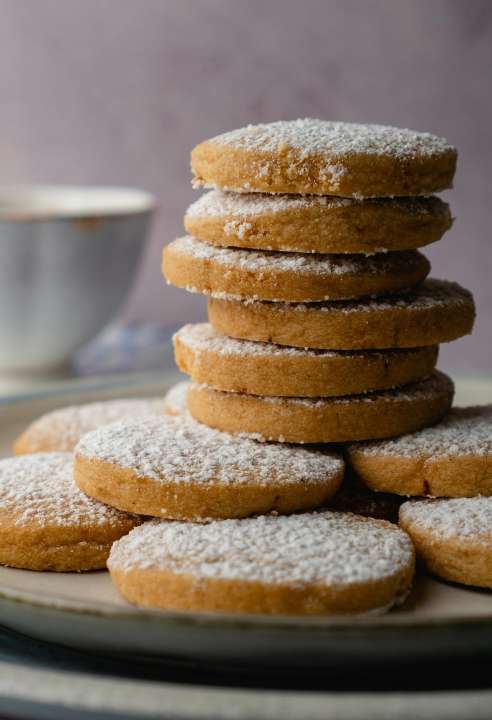
- Bake until light golden brown, about 18–25 minutes, depending on thickness.
- Remove from the oven and, while still warm, cover generously with caster sugar. Once cooled, dust off the excess sugar before serving.
Golden Method
- Preheat the oven to 180 °C (160 °C fan).
- Dice the butter and place it into the bowl of a mixer along with the plain flour and caster sugar. Using the paddle beater attachment, mix on low speed until the mixture comes together to form a dough. This will take some time — resist the temptation to overwork it.
- Turn the dough out onto a clean surface. Take a couple of large handfuls at a time and knead very lightly just to bring it together.
- Roll the dough into a long sausage shape, approximately 5–7.5 cm (2–3 inches) in diameter.
- Wrap tightly in cling film and chill overnight until very firm.
- Once chilled, slice into rounds approximately 3 cm (1¼ inch) thick.
- Place 12 rounds evenly spaced onto a baking tray lined with parchment.
- Bake until light golden brown, about 18–25 minutes, depending on thickness.
- Remove from the oven and, while still warm, cover generously with caster sugar. Once cooled, dust off the excess sugar before serving.
 |
 |